Defining area and perimeter
Objective: To understand what area and perimeter mean, and clearly differentiate them from each other.
In the video, area is defined as ‘the space taken up by a flat shape and is measured in square units’.
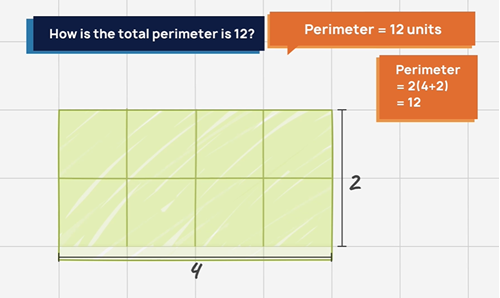
In the video, perimeter is defined as ‘the total length of the shape’s outer boundary’.
Role of teacher: Ensure students clearly understand that:
- area is the space enclosed by the boundary of a shape
- perimeter is the total length of the outer boundary of that enclosed space.
Area of a rectangular shape
Objective: To understand and use methods for working out the area of a rectangle.
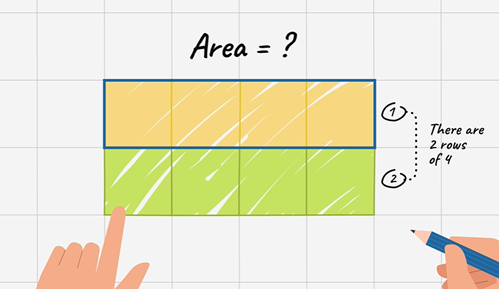
In the video (01.03), students are invited to think about and work out the total area of a 2D shape.
Pause at this point for students to think about:
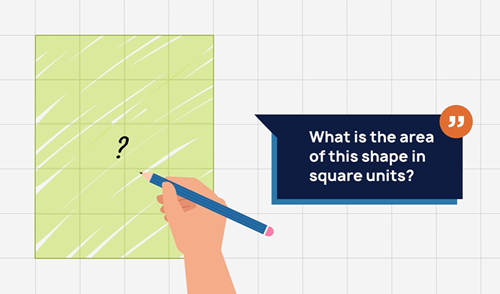
- What is the area of this shape in square units?
- What strategy did you use to calculate the area?
Student strategies may include:
- seeing a length of 5 units and a width of 4 units and knowing that L x W (5 x 4) gives an area of 20 units
- seeing two vertical rectangles of 10 squares, and doubling that
- skip-counting rows of four 5 times (4, 8, 12, 16, 20)
- skip-counting rows of five 4 times (5, 10, 15, 20).
Role of teacher:
- Help students understand and make connections between different strategies for calculating area.
- Invite students to think about which strategies for calculating area make sense to them and why.
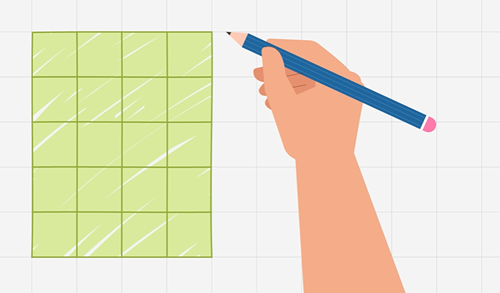
Area: how many ways?
Objective: To apply knowledge and use reasoning to explore a problem about area.
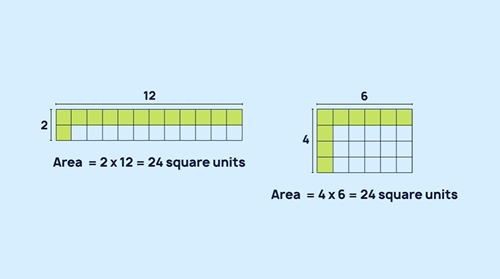
Provide students with 1cm square grid paper. Pause at the point in the video (01.23) where the shapes have 24 square units. Give students time to:
- Look at the two rectangles. What do you notice? What do you wonder?
- What other rectangles have an area of 24 square units? How will you know when you’ve found them all?
Role of teacher:
- Provide students with access to grid paper and sufficient time to find all possible rectangles with an area of 24 square units.
- Encourage the use of strategies for calculating area that are more efficient than counting squares, for example, knowing that 2 rows of 12 can be written and calculated as 2 x 12 = 24.
- Actively invite students to think of ways that they can prove they’ve found all possibilities.
Comparing area and perimeter
Objective: To develop a deeper understanding of area and perimeter by exploring if there is any relationship between the two.
Provide students with grid paper and a pencil.
Pause at this point in the video (01.51). Invite students to look at this table and think about:
- What do you notice? What do you wonder?
- Why is this table interesting? Why is it useful?
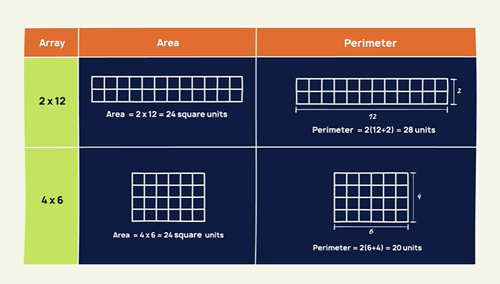
In the video, the following question is posed:
- Is it possible for two shapes to have the same perimeter but different areas?
Formulas for area and perimeter
Objective: To connect prior knowledge and ideas to formal notation used to calculate area and perimeter.
Use the video to support explicit teaching of formulas used to calculate area and perimeter.
Formula for calculating area:
- L x W
Formulas for calculating perimeter:
- L + L + W + W
- (2 x L) + (2 x W)
- 2L + 2W
Role of teacher:
- Facilitate whole-class discussion for students to share their findings and reasoning. Where beneficial, record student ideas involving arithmetic and visual representations on the board.
- Help students recognise that there are different ways to work out area and perimeter. Encourage them to think about why different ways make sense, and which methods they personally prefer.